
Crafting a basking spot for your bearded dragon doesn’t need to stretch your budget. These reptiles rely on heat to digest food, stay active, and thrive, and a well-made platform can replicate their natural sunning habits. When I pieced together a basking area for my bearded dragon, Blaze, using spare tiles and a thrift store find, he settled in like it was made for him, basking contentedly. This guide offers a step-by-step approach to building a budget-friendly bearded dragon basking platform with safe, affordable materials. Perfect for DIY beginners or seasoned owners looking to save, these tips will help you create a warm haven tailored to your dragon’s needs.
Why a Basking Platform Is Essential
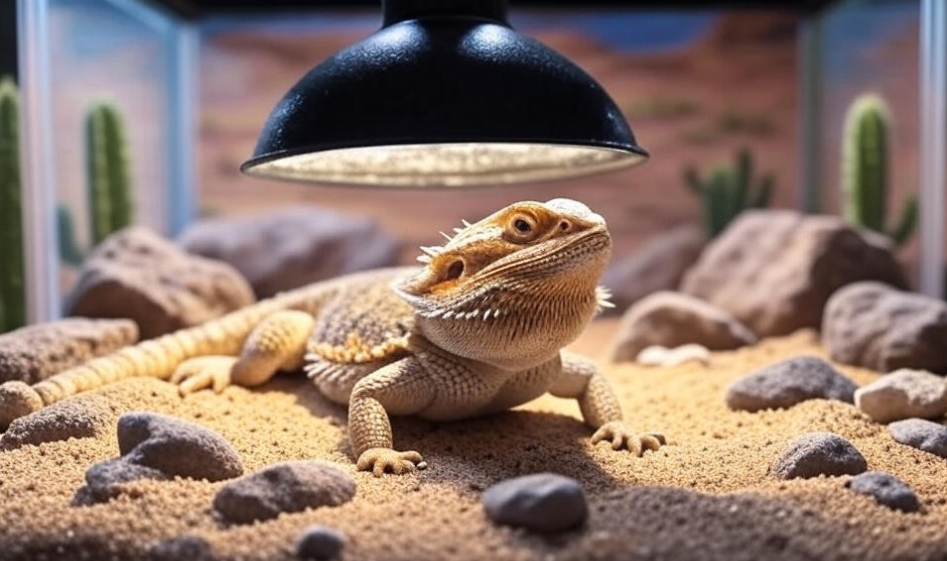
Bearded dragons are ectothermic, depending on external heat to reach their preferred basking temperature of 95-110°F. In the wild, they perch on rocks to soak up sunlight, and a platform in captivity mimics this, offering a raised spot for optimal warmth while allowing cooler areas below. This gradient supports digestion, activity, and overall health.
Without a proper setup, your dragon might overheat on flat surfaces or struggle to warm up, risking stress or poor appetite. Both juveniles and adults benefit, though size adjustments are key—smaller dragons need a snug fit. Reptile vet Dr. Stephanie Nelk stresses the importance of stable heat zones, making a DIY platform a cost-effective way to meet this need.
Affordable Materials to Use
You can skip expensive pet store buys by tapping into household items or budget finds. Slate tiles or ceramic pieces from a hardware store hold heat well and clean up easily. Untreated wood (avoid cedar or pine due to toxins) or smooth river rocks from your yard work too, if sanitized first. I built Blaze’s first platform from a discarded tile I snagged for free, proving you can get creative on a dime.
For supports, stack small, stable stones or use sealed, non-toxic cardboard cutouts to raise the base 4-6 inches. Avoid metals or plastics that might overheat or leach chemicals. Check thrift stores, garage sales, or ask friends for scraps. Add a heat source like a bulb, and you’ve got a solid setup without a big investment.
Step-by-Step Building Guide
Step 1: Gather and Prepare Materials
Collect your base (e.g., slate or ceramic) and supports (stones or sealed cardboard). Wash thoroughly with warm water and a reptile-safe cleaner, then dry completely. Check for rough edges and sand them smooth to protect your dragon’s skin.
Step 2: Assemble the Structure
Stack supports to elevate the base, ensuring it’s sturdy and won’t wobble. For a secure hold, apply a small amount of As an Amazon Associate, I earn from qualifying purchases. Gorilla Super Glue Gel* to hidden areas—owners love its reliable bond. Position the platform under your heat lamp for direct warmth.
Step 3: Add Traction
Top with As an Amazon Associate, I earn from qualifying purchases. Non-Adhesive Shelf Liner (Bearded Dragon Tank Accessories)* or sandpaper cut to size to prevent slipping. This community-favored trick keeps your dragon steady on the surface.
Step 4: Install the Heat Source
Place a heat bulb or As an Amazon Associate, I earn from qualifying purchases. Exo Terra Heat Mat* above or below, based on your tank setup. Use a thermometer to maintain 95-110°F, adjusting the lamp height as needed. Test the platform’s stability and temperature before introducing your dragon.
Step 5: Monitor and Adjust
Watch your dragon’s behavior—basking for 30-60 minutes suggests it’s working. If they avoid it, check the heat or traction. Tweak the height or add more supports if necessary.
Safety Tips for DIY Platforms
Safety is non-negotiable. Ensure all materials are non-toxic and heat-resistant—test tiles or rocks by placing them under the lamp for an hour to check for cracks or scorching. Secure edges to avoid collapses, and avoid glues or paints not labeled reptile-safe. Keep the platform away from water bowls to prevent moisture damage.
Blaze once knocked over an unsteady stack I made, so I learned to double-check stability. If unsure, consult a reptile vet or herpetologist for a quick review.
Enhancing Your Platform on a Budget
Add natural touches like a small branch or rock from your yard (cleaned and baked at 200°F for 30 minutes) for climbing. A layer of safe sand or reptile carpet can mimic their habitat. If you’re setting up the whole tank, the Bearded Dragon Enclosure Calculator offers size and heat recommendations based on your dragon’s age—owners find it invaluable for planning.
For a ready-made boost, As an Amazon Associate, I earn from qualifying purchases. Zoo Med Reptile Rock Den* or REPTI ZOO Large Bearded Dragon Basking Platform, 12.5x7x5 inch* are affordable options many trust for a sturdy base, though DIY saves more long-term.
Here’s a quick comparison of materials:
| Material | Cost | Pros | Cons |
|---|---|---|---|
| Slate Tile | $5-10 | Holds heat, durable | Heavy, needs cleaning |
| Ceramic Tile | $1-5 | Cheap, heat-resistant | Slippery without traction |
| Sealed Cardboard | Free-$2 | Lightweight, customizable | Less durable, needs sealing |
| River Rocks | Free-$5 | Natural look, stable | Requires thorough cleaning |
This table helps you pick based on your budget and tank setup.
Common Mistakes to Avoid
Don’t use untreated wood with oils or metals that overheat—both can harm your dragon. Skipping traction can lead to falls, especially for juveniles. Avoid placing the platform too close to the lamp, risking burns—keep it 10-12 inches away unless a thermometer confirms safety. Overcomplicating with too many materials can also destabilize it.
The Bearded Dragon Care Checklist is a lifesaver here, offering a downloadable guide to double-check safety steps—few tools make setup this foolproof.
Maintaining Your Basking Platform
Clean the platform weekly with a reptile-safe disinfectant to prevent bacteria buildup. Check for wear on glue or supports monthly, replacing as needed. If using natural rocks, inspect for cracks from heat exposure. A clean, stable platform keeps your dragon comfortable year-round.
Busting DIY Myths
Myth: Any rock works for a platform. Fact: Only smooth, cleaned rocks are safe. Myth: Heat mats alone are enough. Fact: A raised spot with a bulb is better for natural basking. Myth: DIY is always cheaper than buying. Fact: It is if you source smartly, but quality pre-made options like REPTI ZOO Large Bearded Dragon Basking Platform, 12.5x7x5 inch* can compete. Test and adjust to find your sweet spot.
Conclusion
A budget-friendly basking platform is within reach with some creativity and care. Follow these steps, use safe materials, and leverage tools like the Bearded Dragon Enclosure Calculator for precision. Your dragon will thank you with happy basking sessions. Got a DIY tip or a photo of your setup? Share in the comments or tell us how Blaze-inspired platforms worked for you!
BeardedBuddies.com collaborates with reptile experts to provide accurate, trustworthy care advice. This site participates in the Amazon Associates Program, earning from qualifying purchases.
About the Author
Dragon King is the founder of BeardedBuddies.com and a reptile enthusiast with over seven years of experience. His bearded dragon, Blaze, once refused to bask until Dragon King crafted a platform from a thrift store tile, sparking his passion for affordable setups. He works with herpetologists to share practical, reliable tips, helping beardie owners worldwide. All advice is based on expert consultations and standard reptile care practices.